
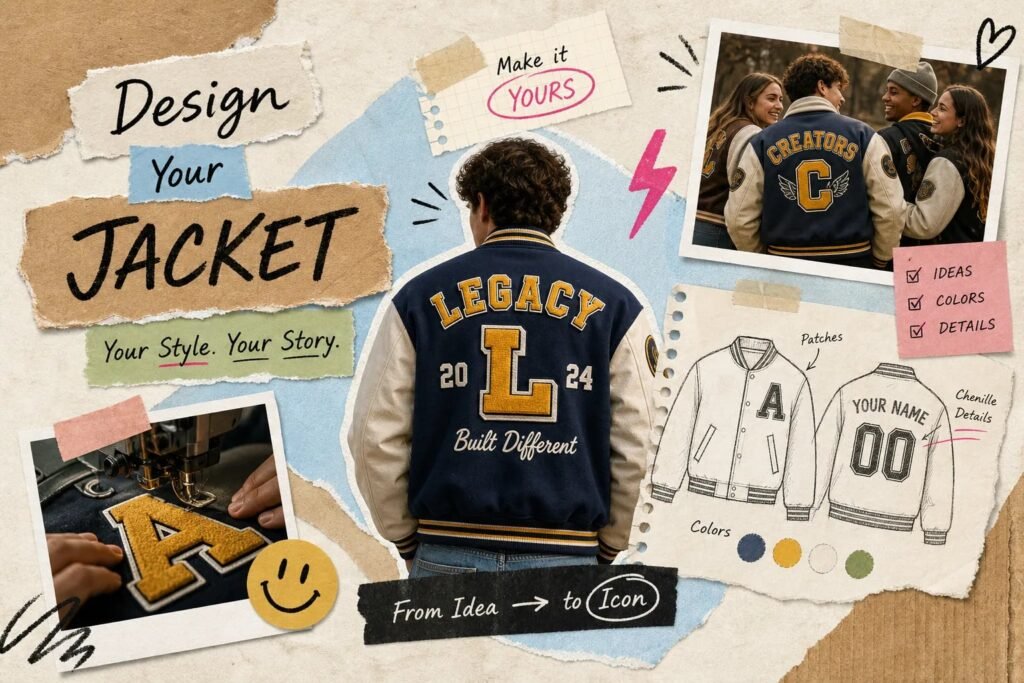
Most people start a custom varsity jacket design the same way: five browser tabs open, color swatches saved to a phone camera roll, and a vague idea of what they want that somehow gets harder to describe the longer they stare at options. They pick a body color, second-guess the sleeve material, realize they never thought about patch placement, and end up ordering something that feels like a compromise rather than a statement.
This guide cuts through that noise. It walks you through every design decision in the right order, so each choice builds on the last instead of creating more confusion. At Nexus Jacket, we built our real-time custom jacket configurator specifically to make this process feel natural. Everything in this article maps directly to decisions you can make live in that builder, which means by the time you finish reading, you’ll be ready to act.
Six design pillars stand between you and a finished jacket you’ll actually love: body fabric and color, sleeve material and contrast, patches and personalization, artwork specs, sizing, and pricing with lead times. Work through them in order and the whole thing becomes straightforward.
1. Custom Varsity Jacket Design: Start with the Body Color and Wool Weight
Your jacket body is the canvas for everything else. Before you think about patches or sleeve color, you need to settle on the fabric and the base color, because both decisions cascade into every choice that follows.
Why Melton wool is the right starting point
Melton wool is a densely woven, tightly felted fabric that resists water, holds its shape, and carries the weight of chenille and embroidered patches without sagging or warping over time. Heavier Melton weights, around 24 oz, are commonly used for premium varsity builds because the extra weight translates directly into warmth, structure, and longevity. Polyester and satin bodies feel lighter and look flashier off the rack. They don’t hold up the same way after a few years of real wear. If you want a custom varsity jacket that feels like a keepsake rather than a seasonal purchase, Melton wool is where you start.
Picking a body color that represents you
Your body color anchors the entire jacket. Once you choose it, your sleeve contrast, trim color, and lining all follow from that decision. In 2026, the most popular combinations lean toward grounded, heritage-inspired pairings: black body with white or gold sleeves, navy body with cream or white sleeves, burgundy body with cream sleeves, and forest green body with white sleeves. These trends reflect what customers are gravitating toward across the custom apparel market this year. If you’re building around school or team colors, start there and let the palette guide the rest. The practical rule is simple: choose the body color first, then build outward from it.
2. Sleeve material: the decision that defines the contrast
Sleeves are the most visually distinct feature on any varsity jacket, at least from a design standpoint, they’re typically the first element that draws the eye and the source of the classic two-tone contrast. Getting this decision right matters, because it affects both the jacket’s look and its long-term durability.
Genuine leather vs. faux leather: what the difference actually costs you
Full-grain cowhide leather sleeves are durable, develop character with age, and carry the kind of weight and texture that signals quality immediately. They require occasional conditioning and are heavier than faux alternatives, but they hold up through years of daily wear without peeling or cracking at stress points. PU and faux leather sleeves are lighter, easier to clean, and more affordable upfront, but they tend to degrade faster at seams and creases. For a jacket that’s meant to last through high school and beyond, genuine leather is the better long-term investment. The cost difference is real, but so is the lifespan difference.
Color contrast strategies that make your jacket stand out
The classic approach is light sleeves on a dark body, or dark sleeves on a lighter body. Both create the high-contrast silhouette that makes a varsity jacket immediately readable from across a room. If you prefer a more understated look, tone-on-tone combinations like navy on navy or charcoal on black give the jacket a streetwear-forward feel that works well beyond school settings. One thing to factor in before finalizing: your sleeve color also affects how patches and lettering read against the material. Test your sleeve color against your planned patch colors before you lock anything in.
3. Custom Varsity Jacket Design, Patches, Names, and Numbers
This is where personalization moves from concept to visible identity on the jacket. The right patches, placed correctly and built from clean artwork, are what separates a custom letterman jacket from something you could pull off a shelf. This section covers every decision in this category, including the ones most people skip until it’s too late to fix them.
Chenille vs. embroidered patches: which one fits your design
Chenille patches are thick, raised, and textured. They carry the traditional varsity look and work best for large, bold elements like a varsity letter, a mascot, or a class year. A chenille patch jacket built around one strong chest piece is a classic for a reason, it’s bold, readable, and immediately recognizable as a varsity style. Embroidered patches are flatter with finer detail capability, which makes them the right choice for intricate logos, small team emblems, and name text. Many well-designed custom jackets use both: chenille for the main statement piece on the chest, embroidery for names, numbers, and smaller detail patches. Chenille tends to cost more per patch because of the material and production process involved, so factor that into your budget as you plan the full layout.
Placement conventions that read clearly at a distance
The standard layout places the main letter or mascot on the left chest over the heart, the name across the right chest, and the number or graduation year on a sleeve. Back patches and full-back designs are a strong option for teams and organizations that want to make a unified statement. There’s creative flexibility within these conventions, but the classic placement reads cleanly at a distance and looks intentional rather than improvised. If you’re ordering matching team letterman jackets, consistent placement across every jacket is especially important for a cohesive result.
Artwork specs to get right before you submit
Vector files are the gold standard: AI, EPS, SVG, and PDF scale to any size without quality loss. If you’re submitting a raster image like a PNG, it needs to be at least 300 DPI at the final patch size, with a transparent background and outlined fonts. Pantone color codes or exact hex values help ensure thread colors match what you’re expecting. Nexus Jacket has a design team that can help clean up artwork before it goes into production, which removes a lot of the guesswork for customers who aren’t working with a professional designer.
4. Getting your fit right before you lock in the order
Sizing is where a surprising number of custom jacket orders go sideways. A jacket can be built from perfect materials with flawless patches and still feel wrong if the fit is off. Getting this right before you submit is far easier than dealing with exchanges after the fact.
How to take the four key measurements
Measure your chest around the fullest point, level under the arms, snug but not tight. For sleeve length, run the tape from the top of your shoulder seam to your wrist bone, or measure a jacket you already own from shoulder seam to cuff. Shoulder width goes seam to seam across the widest point of your back. Body length runs from the base of your neck down to where you want the hem to fall. The best practice is to take both your body measurements and the flat measurements of a jacket that fits you well, then compare both to the vendor’s sizing chart rather than relying only on the letter size label.
Why sizing charts differ across vendors and how to navigate it
Some vendors list body measurements; others list garment measurements like pit-to-pit chest width. The same “Large” label can represent meaningfully different chest widths depending on the brand, so comparing sizes across vendors by label alone leads to mistakes. If you’re ordering for a team, collect everyone’s measurements using the same method and the same chart. When you’re on the fence between two sizes, go up. Varsity jackets are typically worn over a shirt or hoodie, and extra room is easier to manage than a jacket that won’t close comfortably.
5. Using Nexus Jacket’s Design Builder for Your Custom Varsity Jacket Design
Once you’ve worked through your materials, colors, patches, and measurements, the next step is actually building the jacket. Nexus Jacket’s online configurator is designed to let you apply every decision from this guide in real time, without guessing how the final product will look.
What the real-time configurator actually lets you do
You can select body and sleeve colors simultaneously and watch the combination update live on screen. Toggle between chenille and embroidered patch options for each element and add your name, number, and custom text with font and color choices. From there, upload team logos or custom artwork directly into the builder and review the jacket preview from multiple angles as you make each choice. For team orders, a single design session can be configured across multiple sizes with consistent branding throughout.
Why the builder beats a blank order form
Most vendors ask you to fill out a text-based form and wait days for a mockup. Nexus Jacket’s builder removes that uncertainty with immediate visual feedback at every decision point. The on-screen preview is designed to reflect your final color and patch selections as closely as possible before you commit.
Every order also comes with free USA shipping, a 30-day return and exchange policy, and a 6-month craftsmanship warranty, so you can commit to a design with real confidence rather than hoping for the best.
6. Pricing, lead times, and what to expect after you order
Knowing what to expect before you place an order saves a lot of frustration. Costs and timelines vary based on the materials and complexity you choose, but the ranges are predictable once you know what drives them. Here’s a quick look at the two factors that matter most: cost and production timing.
What drives the cost of a fully custom varsity jacket
Entry-level builds with a satin body, faux leather sleeves, and basic embroidery generally start around $200 and up, depending on the vendor. Mid-range builds using a Melton wool body, genuine leather sleeves, and a chenille plus embroidery combination run from $250 to $400. Premium builds with heavy Melton wool, full-grain cowhide leather, a full-back chenille design, and multiple custom patches can reach $400 to $600 or more, and highly customized builds at some vendors can push beyond that. Bulk orders of ten or more jackets typically unlock per-unit savings; single-jacket minimums are standard at direct-to-consumer brands like Nexus Jacket, so there’s no pressure to order more than you need.
Production timelines and what happens after approval
Standard production for a single custom jacket runs about 10 to 15 business days after design approval. Bulk and team orders take three to six weeks from proof sign-off, depending on complexity and order size. Rush production is available and can bring turnaround down to roughly 10 to 14 calendar days, though it carries an additional surcharge. After production, standard domestic shipping adds three to seven business days for most USA destinations. One timing note worth planning around: the graduation window from April through June and the back-to-school period in August and September see the highest demand and the longest queues, so earlier is always better if your order is date-sensitive.
Your jacket starts with one decision at a time
The full sequence looks like this: body color and wool weight, sleeve material and contrast, patch type and placement, artwork prep, accurate sizing, and finally, a builder that ties every choice together visually before you commit. None of these steps are complicated on their own. The key is working through them in order rather than jumping around and creating confusion.
A jacket built this way doesn’t feel like a compromise. It feels like exactly what you intended to make, because every decision was intentional. That’s the difference between a jacket that gets worn and one that gets buried in a closet after a season.
If you’re ready to begin your custom varsity jacket design, reach out to the Nexus Jacket team or open the design builder and start with your body color. Free USA shipping is included on every order, and the 6-month craftsmanship warranty means there’s no risk in taking that first step today.